
STEP 1 - Install and configure jBackend
The first step is to install jBackend package from the Joomla panel according to the installation procedure. After enabled the user module and the content module from jBackend plugins, it is necessary to create an end-point as described in the initial configuration. For this demo we choose the free access type for the end-point, in this way there are no restriction calling the end-point URL (http://www.support4joomla.com/jbackend/rest). Now our backend server is ready to use.
STEP 2 - Create the web app
To make this demo we decided to use Foundation rather than the most common Bootstrap. The reason for this choice is related to the availability of the Off Canvass menu out of the box.

As Javascript libraries we used jQuery and Modernizr. The source package can be downloaded here. The zip file contains a "jbackapp" folder which could be extracted under the web root folder of your local web server. In this case to execute the web app just open your favourite browser and call the URL http://localhost/jbackapp. The content URLs are configured in the file main.js under the js folder:
  // List of feeds to retrieve
  /*var feeds = {
    section_a: "http://www.support4joomla.com/jbackend/rest/get/content/articles?catid=64&maxsubs=2&limit=10&orderby=id&orderdir=desc",
    section_b: "http://www.support4joomla.com/jbackend/rest/get/content/articles?catid=26&maxsubs=2&limit=10&orderby=id&orderdir=desc",
    section_c: "http://www.support4joomla.com/jbackend/rest/get/content/articles?catid=29&maxsubs=2&limit=10&orderby=id&orderdir=desc"
  };*/

  // List of feeds to retrieve
  var feeds = {
    section_a: "feed.php?id=64",
    section_b: "feed.php?id=26",
    section_c: "feed.php?id=29"
  };
The real URLs that link to jBackend are commented. This is because calling the web app on localhost with these URLs will lead to an 'Access-Control-Allow-Origin' error. To avoid this, we have added a little feed.php script which works as reverse proxy, and this is the reason for the second group of URLs, all linking to feed.php on localhost.

Just remember to comment or delete this group and enable the first group before to compile the app (or it will not work on the smartphone).
STEP 3 - Create the Phonegap project and adding the web app code
The last step is to create a Phonegap project and include the web app created before. To create a new Phonegap project it is possible to use the Command-line Interface, or to use Phonegap Wizard under Eclipse ADT.
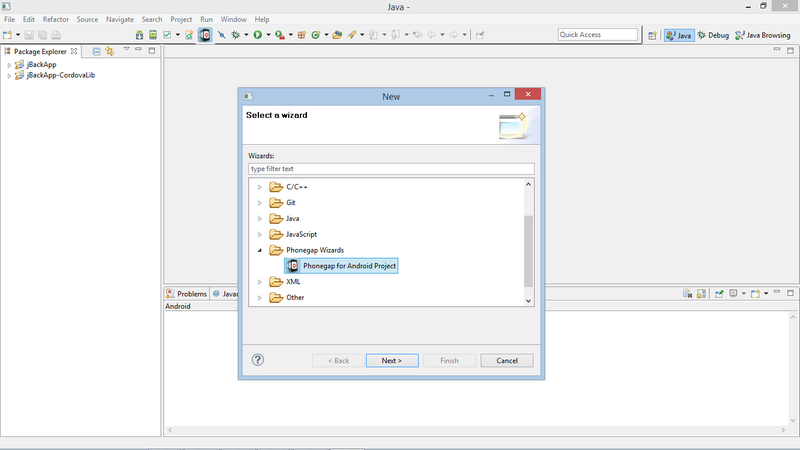
After project creation it is possible to integrate the source under assets/www with the code of our web application. The most important change to the web app code is to include the library cordova.js:
<script type="text/javascript" src="/cordova.js"> </ script>
Now we are ready to compile our app. The result APK package is available here. To install and test the package on your device remember to enable "unknown sources" from device security settings (this is necessary when the APK doesn't come from the Google Play Store).